The most important points first:
F2 EcoHull is repairable. Most damage can be fixed easily with the F2 EcoHull Repair Kit. A repair follows exactly the layer build-up of the original system. Each layer is applied slightly larger than the one beneath it, so that no visible edges form.
Important: damage to the coating is not dramatic in principle. Water cannot get under the intact coating at a damaged spot. The effect stays local, limited to the damaged area.
A repair under water is not possible. The coating needs a completely dry surface.
Damage assessment in three levels
Before you buy any materials, identify the damage level. It determines which components you need.
| Level | What you see | What to do |
|---|---|---|
| Level 1 | Top Coat damaged locally. The colour is still visible throughout. The spot just looks duller or rougher than its surroundings. | Small (< 5×5 cm): Top Coat only. Large (≥ 5×5 cm): Adhesive Coat plus Top Coat. |
| Level 2 | Adhesive Coat penetrated. The primer underneath is visible. | Sand, Adhesive Coat, Top Coat. |
| Level 3 | Down to the bare hull. Gelcoat, bare aluminium, steel or wood visible. | Check the substrate, 2K epoxy barrier coat in several layers, Adhesive Coat, Top Coat. |
For Level 1 damage under 5×5 cm, a spot Top Coat repair is enough. From 5×5 cm upwards we recommend refreshing the Adhesive Coat as well. That reliably preserves the layer thickness.
How long the repair takes
The actual hands-on time at the damaged spot is short, usually just minutes. What stretches a repair out are the waiting times between layers, when there is nothing to do. So plan around the pauses, not the working time.
| Damage level | Hands-on work | Waiting times in between |
|---|---|---|
| Level 1A (Top Coat only) | A few minutes | 4–6 h until touch-dry, then launch. About half a day in total, almost all of it drying. |
| Level 1B and Level 2 (Adhesive plus Top Coat) | A few minutes per layer | At least 4 h to touch-dry between layers, then 4–6 h until launch. About one working day with pauses in total. |
| Level 3 (down to substrate, with barrier-coat primer) | Manageable | Primer curing; with a solvent-based primer, at least 7 days of off-gassing before the Adhesive Coat. Several days up to more than a week in total. |
What you need
-
F2 EcoHull Adhesive Coat, 100 ml Level 1 large, 2, 3
-
F2 EcoHull Top Coat, 100 ml all levels
-
F2 Degreasing Solution all levels
At a coverage of 10 m²/L, each 100 ml tin is enough for about 1 m² of repair area. That covers far more than most damage amounts to. Buy the Repair Kit →
-
2K epoxy barrier-coat primer. Smallest F2 EcoPrimer container: 0.5 L. Alternatively Hempel High Protect II or similar.
-
Sandpaper P180–P220
-
Mixing cup (for Level 3 with 2K primer)
-
Small foam rollers or fine brushes
-
Bucket, sponge or brush
-
Gloves, goggles, protective suit. Mask recommended.
Ambient conditions
| Parameter | Requirement |
|---|---|
| Air temperature | > 10 °C |
| Surface temperature | At least 3 °C above dew point, avoid condensation |
| Humidity | < 90 % |
| Work area | Do not sand or polish nearby |
The repair area must be completely dry before application. Residual moisture under the new coating leads to adhesion problems.
The principle behind every repair
Two things decide whether the repair ends up clean and inconspicuous. They apply to every repair that involves sanding, that is, whenever more than a thin Top Coat touch-up is needed (Level 1B, Level 2 and Level 3).
Feather the edge
Sand the edge of the damaged area to a shallow taper. If a vertical edge is left standing, the new coating sits on it as a step you can see and feel. If the edge runs out flat instead, the repair blends inconspicuously into the old coating.
In practice: when matt-sanding with P180–P220, work not only the damaged spot but also a few centimetres into the intact coating all around, and let the transition taper out thinly.
Apply each layer larger than the last
As you rebuild, apply each layer slightly larger than the one beneath it. If needed the primer first, then the Adhesive Coat a bit larger, then the Top Coat as the largest layer. That way each new layer rests all around on sound, sanded material, and no edge forms.
First feather the edge flat, then work from the inside out, each layer larger than the last. The Top Coat is always the largest and final layer.
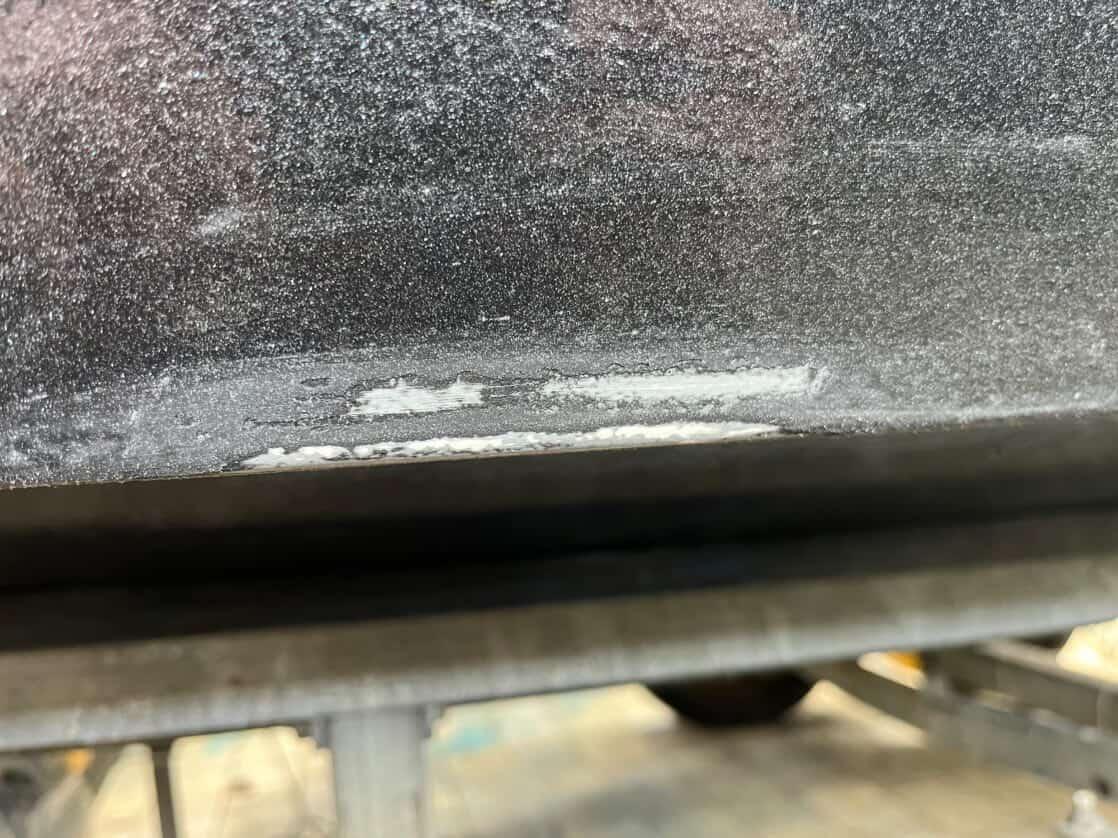
Top Coat scratched
How to tell: the spot looks duller or rougher than its surroundings and has less fouling-release effect, but the colour of the Adhesive Coat is still visible throughout.
Option A: damage under 5×5 cm
Renew the Top Coat only. There is no sanding here; the spot is just cleaned and recoated.
Option B: damage from 5×5 cm
For larger areas, refresh the Adhesive Coat as well. That preserves the layer thickness and with it the performance.
Penetrated down to the primer
How to tell: at the damaged spot the colour of the Adhesive Coat is gone. You can see the colour of the primer underneath showing through.
Down to the substrate
How to tell: you can see the bare hull. Gelcoat, aluminium, steel (with rust) or wood are visible.
Damage down to the substrate may also have caused structural problems. Before any coating repair, check: are there cracks, dents or soft spots in the hull? With aluminium or steel: corrosion? With wood: swollen fibres or moisture? When in doubt, consult the yard. Only proceed with the repair once the substrate is structurally sound.
Choosing the 2K epoxy barrier-coat primer
| Primer type | Procedure before Adhesive Coat |
|---|---|
| Solvent-free (F2 EcoPrimer, Hempel High Protect II or similar) | Several layers, recoat with Adhesive Coat within 24 h. If exceeded: sand again with P180 and clean. |
| Solvent-based | Several layers, leave to off-gas for at least 7 days at 20 °C (the solvents must escape completely). Then sand with P180 and clean, then Adhesive Coat. |
Launching after the repair
Unlike after a full recoat, after a spot repair you usually do not need to wait 36 hours before craning. This holds as long as the repaired spot is not in the sling area and takes no mechanical load during launching. If it is in the sling area, the 36 hours apply as for the initial application (see the F2 EcoHull guide).
| Situation | Wait before launching |
|---|---|
| Spot repair outside the sling area | As soon as the Top Coat is touch-dry (4–6 h at 20 °C) |
| Repair spot is in the sling area | At least 36 h, as for the initial application |
As with the initial application, the repair reaches full cure only after 8–12 weeks in the water. Avoid mechanical loads and pressure washing in the first weeks.
Common mistakes
| Mistake | Consequence |
|---|---|
| Spot not completely dry | Loss of adhesion; the coating comes off after days or weeks |
| Applied too thinly | No closed film, reduced performance |
| Vertical edge left standing, not feathered | A visible and tangible step; the new layer lifts off at the edge |
| Layers applied the same size | Visible edge between old and new |
| Colour not fully opaque | Adhesive Coat not stirred enough, pigments at the bottom of the tin, colour deviation at the repair spot |
| Missed the EcoPrimer 24 h window (Level 3 with F2 EcoPrimer) | Adhesive Coat adheres poorly, re-sanding required |
| Cleaning with solvent instead of Degreasing Solution | Adhesion problems likely |
Need materials? F2 EcoHull Repair Kit →
Still have questions? Help centre →